A Brief Example
In order to understand Grafikilo 16, it's important to understand the difference between bitmap graphics and vector graphics. If you don't yet know the difference, please read the explanation here.
A brief example of how to use Grafikilo 16 follows. The goal is to put a speech balloon into a picture.
The first step is to load a picture into the drawing canvas. Use the function 'Select a picture for the background', from the Background menu. You can load any bmp, jpg, or png format picture.

I've selected A-Reading-from-Homer.png (by Alma Tadema). Notice that the name appears in the top bar of the frame.
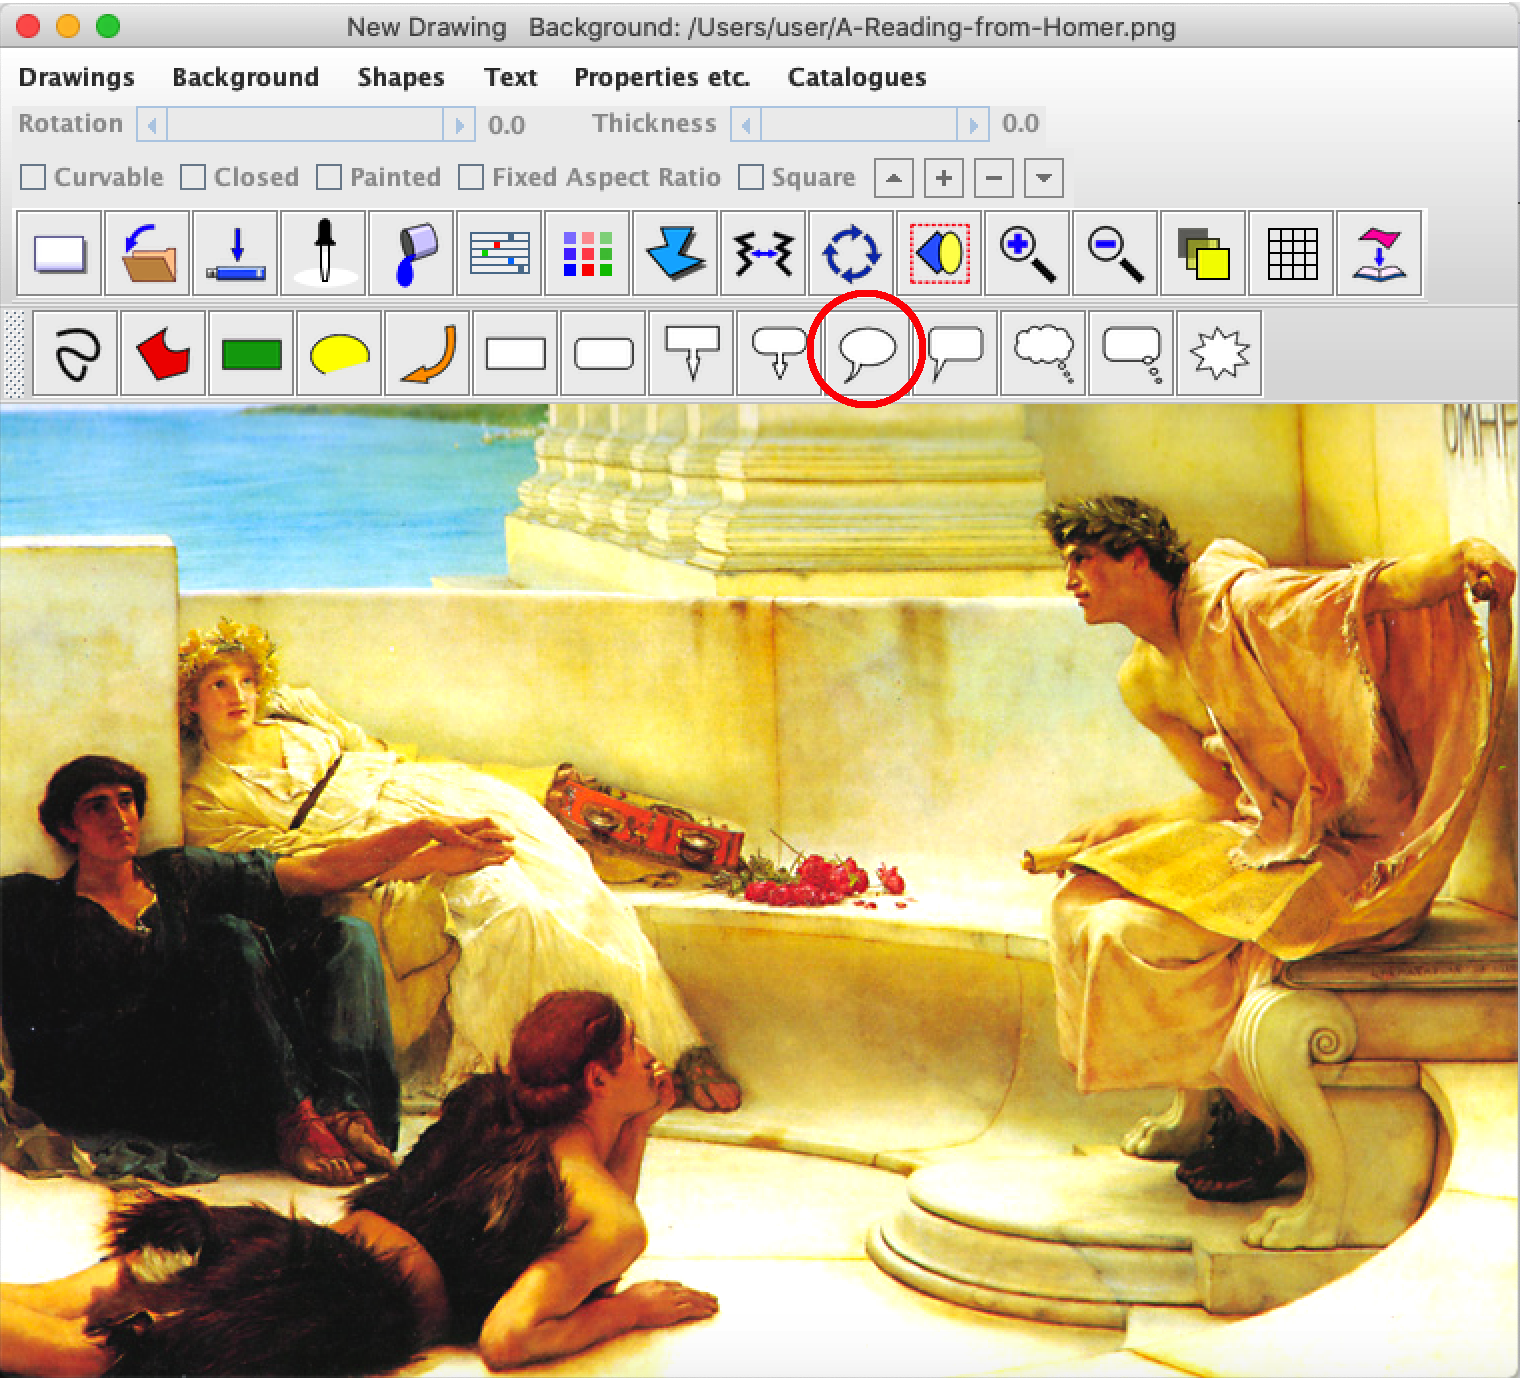
The next step is to select the shape you want to display. I've selected the round speech balloon from the row of shapes above the canvas. (Circled in red.)
 A dialogue box will display the message, "Click on the canvas to place the shape."
Do that, and the new shape will appear. The default text is "Change this."
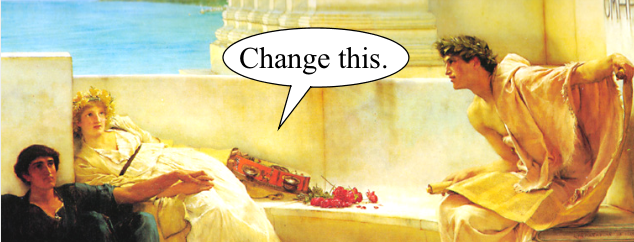
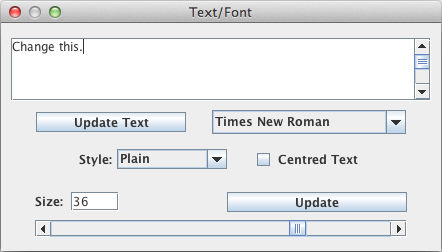
To change the default text, double click on the speech ballon, or, select Text / Font Properties from the Properties menu. The Text/Font dialogue will appear, as below.
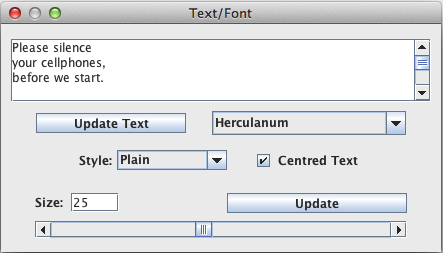
In this example, I've changed the text, the font and font size, and centred the text.
Update the speech balloon by clicking on 'Update Text'. Notice that there are control points on the shape, and red lines around it.
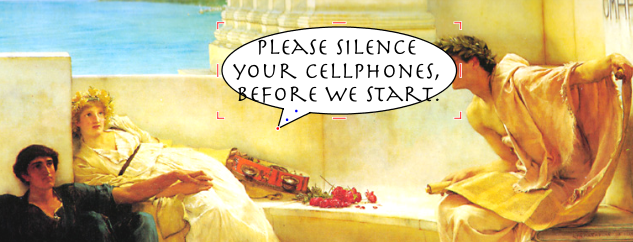
Click on the shape, and, holding the left mouse button down, drag it to a suitable position.
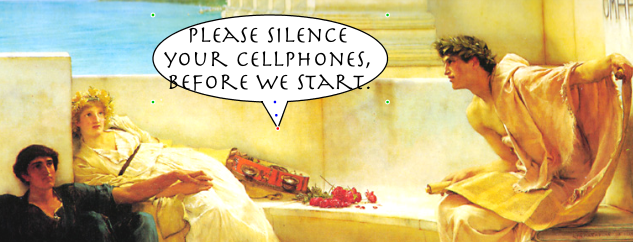
When you click on the balloon, the controls will alternate between eight red 'handles' and four green points. The red handles are for stretching the balloon and the text it contains. The green control points are used to adjust the size of the balloon only; they don't change the size of the text. Drag a green control point to put a suitable margin around the text, as below.
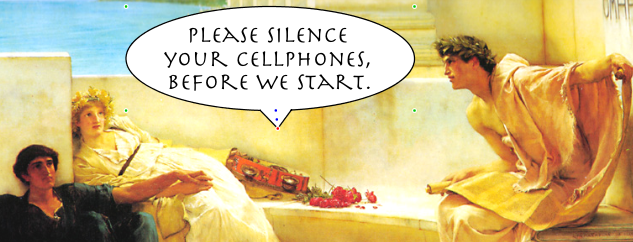
At the end of the speech balloon's 'tail' is a red control point. Click on this point, and drag it to a suitable position, as shown below.
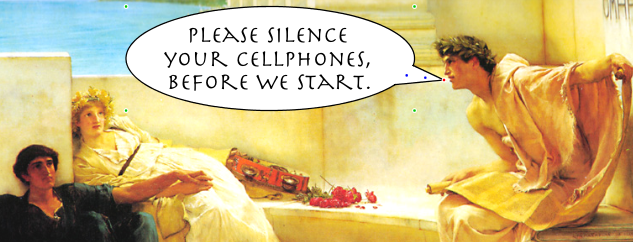
There's a blue control point in the middle of the tail. Drag this point a short distance, to make the tail curved.
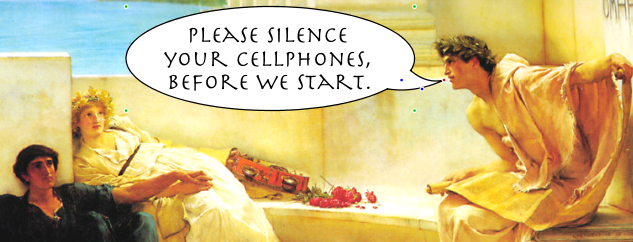
If you want to save the speech balloon which you have just drawn (you probably should), click on the save button (a picture of a USB memory stick). Alternatively, select Save under the Drawings menu. You should save the file with an extension of g16, for example, homer.g16 .
Note: This file contains only the speech balloon which you have drawn. It does not include the background picture.
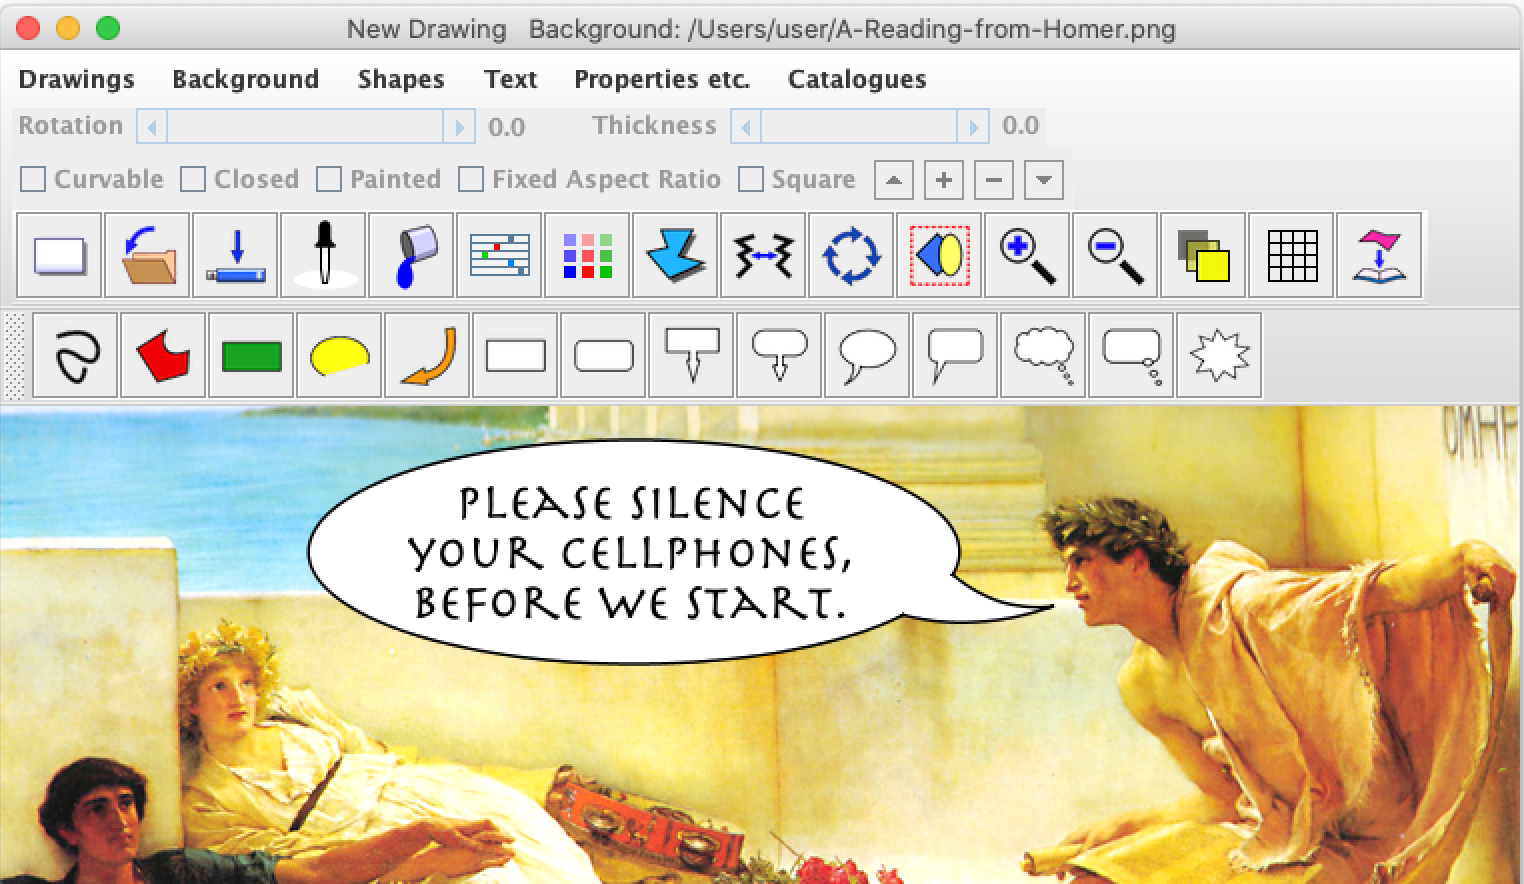
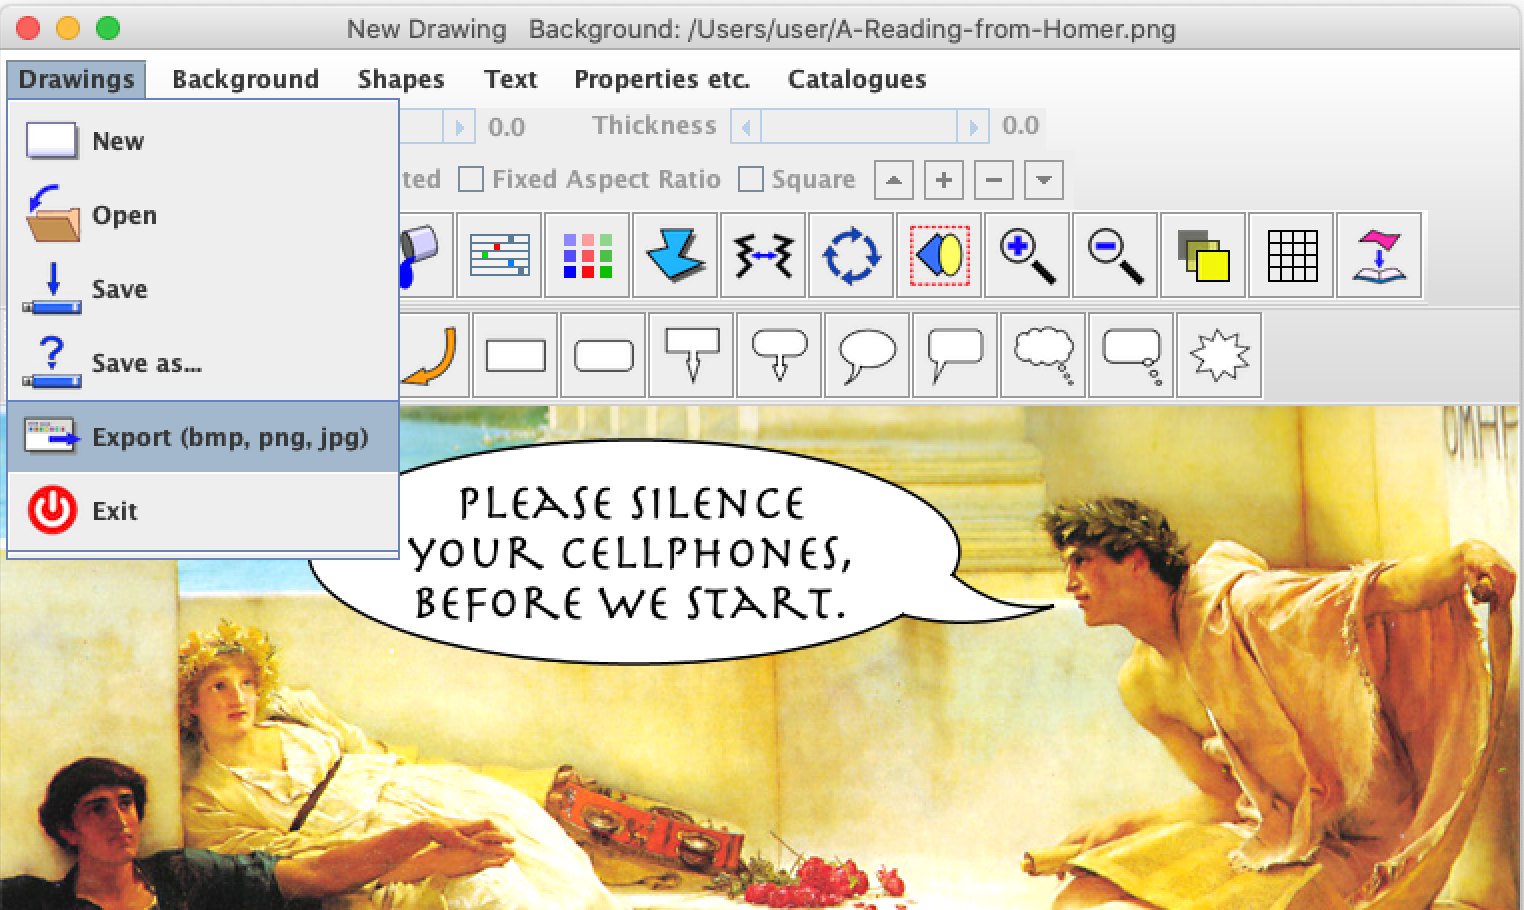
To make a picture which you can post on the internet or send to others, select Export from the Drawings menu.
A file dialogue will appear. Enter a name and file extension, for example, phonehomer.png. The formats bmp, jpg, and png are valid, but png is preferred.
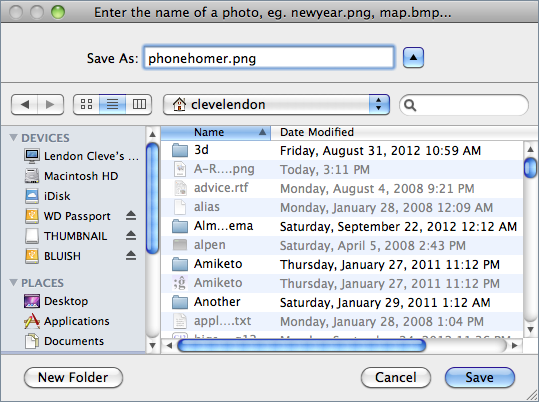
Click on Save, and the new picture is finished.
Remember, phonehomer.png is a bitmap graphics file which anyone can view. It contains the complete image, both the background and the speech ballon. The file homer.g16 is a vector graphics file which contains only the speech ballon, and can only be displayed by Grafikilo 16.
Homer.g16 is useful if you want to change the speech balloon later.
Done.
