Colour
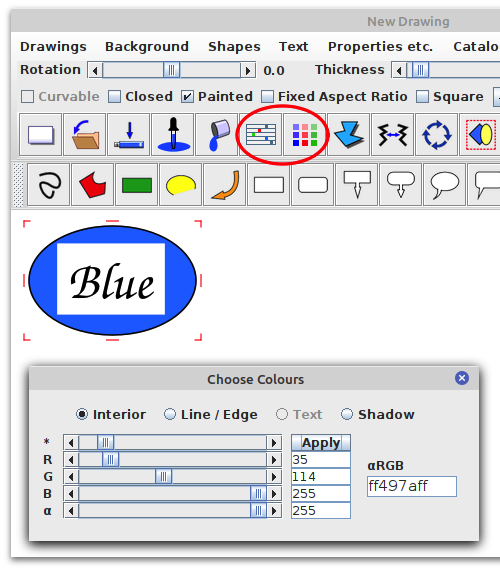
The screenshot at right shows a drawing of two shapes: a blue oval, and a text box on top of it.
Grafikilo 16 has two colour dialogues. Their icon buttons are circled in red at right. The first (on the left) opens a colour-dialogue with sliders, which appears at the bottom of the photo.
There are 3 colour sliders for the three primary colours: Red, Green, and Blue. The top slider, marked with an asterisk (*), slides R, G, and B together.
In this example, the oval has been selected (with a mouse click), and the interior colour has been made blue by moving the blue slider to its maximum value (255).
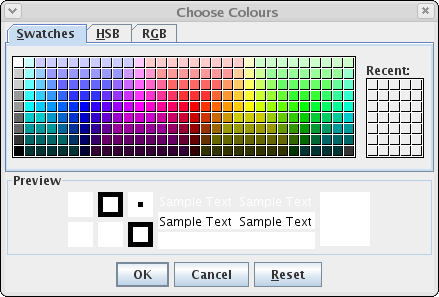
The second icon button opens the standard Java colour chooser. This dialogue provides several methods for selecting a colour, but it can only change the interior colour of a shape, not the edge colour, etc.
Background Colour
The drawing canvas is white by default, but this can be changed. Simply click on the background and select a colour. Of course, the canvas colour is only visible when there is no photo in the background.
Transparency
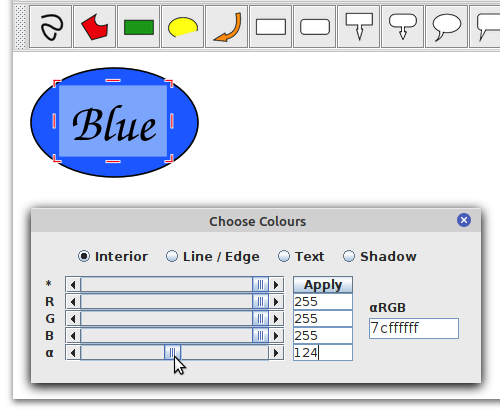
The alpha slider (α) controls transparency. The maximum value, 255, is fully
opaque, and the minimum value, 0, is fully transparent.
In the screenshot at right, the interior of the text box has been made partially transparent.
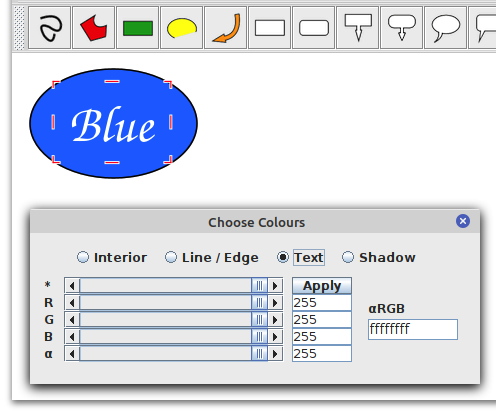
In the screenshot shown here, the background of the text box has been
made completely transparent, and the letters of the text have been made
white, by clicking on the Text radio-button and sliding all the sliders
to the maximum value.
Values can also be changed by typing them into the text fields beside the sliders, and clicking on 'Apply'. Valid values are between 0 and 255, inclusive.
Also, under the label αRGB is a text field which represents the colour as a hexadecimal number. The number consists of 4 parameters: alpha, red, green and blue.
To represent red, the four parameters would be: ff (completely opaque), ff (maximum red), 00 (no green), 00 (no blue). Together, that would be: ffff0000.
If you want to change a colour and you know its hexadecimal number, type it into the hex-field and type the Enter key. This will apply the colour and adjust the sliders.
Pipette and Paint Bucket
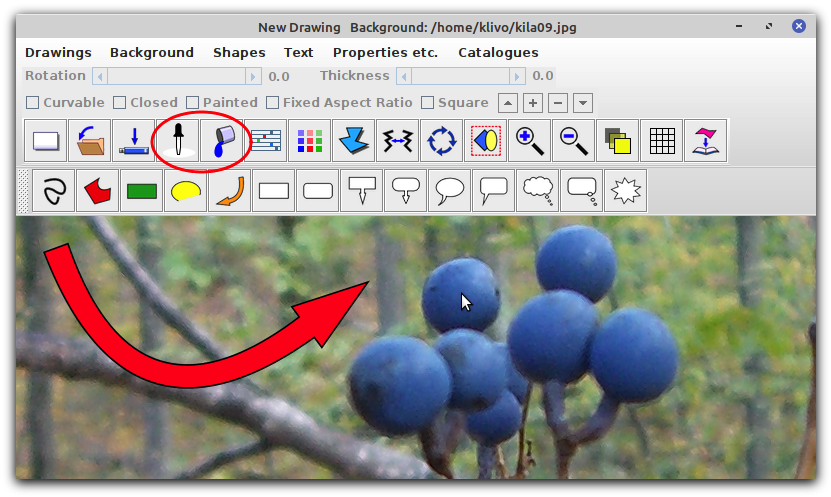
The pipette and paint bucket icons (circled in red below) provide an easy way to select a colour and paint a shape.
In the example below, there is a background photo with a red arrow drawn on top. The goal is to change the colour of the arrow. The first step is to click on the colour we want to transfer. The berry in the picture has a nice blue colour, so I clicked on it.
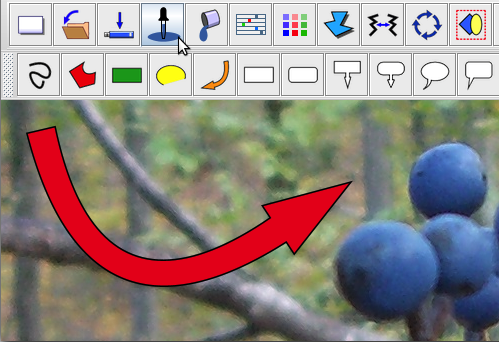
Next, click on the pipette. Notice that the paint has become blue.
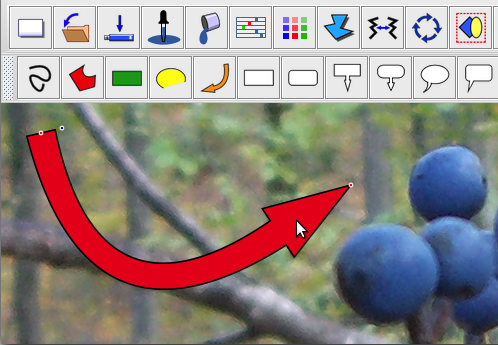
Click on the shape whose colour is to be changed; in this case, the arrow.
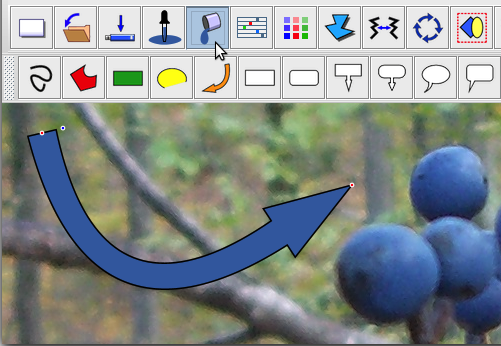
Finally, click on the paint bucket. The blue colour will 'pour' into the shape,
as show here.
Please note: this method can only be used to change the interior colour of a shape. It cannot be used to change the colour of the edge, text, or shadow.
